


Say goodbye to rusty dishwasher racks! Learn how to clean, repair, and recoat your rack step by step. Protect your dishes, save money, and turn a flaking nightmare into a gleaming DIY success.
You open your dishwasher and notice rust spots or flaking coating on the racks, making dishes feel less secure. This common issue occurs because racks endure constant wear – metal tines rub against dishes, detergents and mineral-rich water erode the coating, and repeated heat and moisture accelerate corrosion. Even high-quality racks eventually show damage where the protective enamel or vinyl has worn thin or cracked.
In this blog, you’ll learn how to clean a dishwasher rack, including how to assess damage, safely remove rust and grime, repair common rack issues, and apply a durable coating that restores protection and helps you avoid costly dish washer repair or full rack replacement.
Why Dishwasher Racks Deteriorate (And When Repair Makes Sense)
Dishwasher racks are exposed to a harsh environment that accelerates wear. Understanding the causes of deterioration helps you decide whether to clean, recoat (rerack), apply a coating like Plasti Dip, fix small problems, or opt for replacement.
Causes of rack deterioration
- Constant exposure to hot water and steam – Repeated cycles of heat and moisture weaken plastic coatings and can loosen protective vinyl or polymer coatings, exposing metal underneath.
- Harsh detergents and bleach – Strong detergents, high-alkaline cleaners, or bleach can eat away at the rack’s coating over time, causing brittleness and direct metal exposure.
- Physical wear and impact – Loading heavy items, bumping, or scraping against the rack chips the coating, creating entry points for rust.
- Rust from underlying metal – Once the protective coating is breached, the underlying metal can oxidize and form rust that spreads under and around the coating.
Signs it’s time to address the problem
- Visible rust spots – Small orange or brown spots on the rack indicate the coating has failed and metal is corroding.
- Chipped, cracked, or peeling coating – Areas where the vinyl/plastic coat is missing or flaking mean the rack is vulnerable to further corrosion.
- Rust marks on dishes or dishwasher interior – Brown or orange staining on plates, glasses, or the tub shows rust particles transferring from the rack.
- Sharp or rough edges – Exposed, corroded metal can develop burrs or sharp edges that can scratch dishes or cut hands when loading/unloading.
When to repair (fix, clean, or recoat) vs. replace
Repair/clean/recoat when:
- The rust is superficial and limited to small localized spots.
- The rack structure is intact and not bent or broken.
- You want a cost-effective short-to-medium-term solution. Cleaning, sanding off rust, treating with a rust inhibitor, and applying a food-safe rack coating or Plasti Dip can extend life.
Replace when:
- Rust is widespread, has penetrated or eaten through metal, or the rack has large areas of flaked coating.
- Structural components are damaged. Broken tines, warped frame, missing wheels, or compromised welds affect function.
- Repeated repairs have failed or the cost of parts and labor approaches the price of a new rack or replacement unit.
If you’re unsure, clean and treat a small area first and monitor for recurrence. For heavy corrosion, replacement is safer and often more economical in the long run.
What You’ll Need to Clean and Recoat Your Dishwasher Rack
To clean and recoat your dishwasher rack, you’ll need a mix of basic cleaning supplies, surface prep tools, and a durable, dishwasher-safe coating. Proper preparation ensures the new coating bonds well and holds up to repeated wash cycles.
Materials:
- White vinegar – Cuts mineral deposits and helps loosen grime and light rust
- Baking soda – Acts as a mild abrasive and deodorizer to remove residue
- Dish soap (degreasing) – Removes grease and food particles so coatings adhere properly
- Rust remover or naval jelly (optional, specialty) – For treating stubborn rust spots before recoating.
- Coating product (vinyl dip, epoxy paint formulated for appliances, or food-safe/Plasti Dip alternatives) – The actual recoat must be food-safe, water- and heat-resistant, and suitable for metal immersed in warm water cycles.
- Rags and paper towels – For wiping and drying
- Isopropyl alcohol or acetone (small amount) – Final wipe to remove oils for best adhesion
Tools
- Wire brush or medium-grit sanding sponge – To remove loose rust and old coating.
- Fine-grit sandpaper (220–400 grit) – For final surface smoothing to promote adhesion
- Small paintbrushes or foam brushes – For detail work and touchups
- Plastic sheeting or drop cloth – To protect work surface
- Disposable gloves and safety glasses – Protect skin and eyes when using chemicals
- Masking tape – To mask off areas you don’t want coated
- Spray shelter or well-ventilated area (or spray booth) – Needed if using aerosol coatings like Plasti Dip or spray epoxy. Set up in a garage or outdoors per product instructions.
Cleaning agents like vinegar, baking soda, and dish soap remove grease, limescale, and food residue that prevent coating from bonding. Rust remover and mechanical abrasion like brush eliminate loose corrosion so the new coating adheres to solid metal, not flaky rust.
The correct coating product ensures durability and safety when dishes are washed. Wrong coatings can peel, contaminate dishes, or degrade quickly. Tools like brushes, tape, and protective gear let you apply coatings neatly and safely.
Most items listed are household basics. Specialty items like rust remover and appliance-grade epoxy are best purchased at hardware stores, home centers, paint suppliers, or reputable online retailers.
When choosing a coating, prioritize labels that specify food-contact safety, heat and water resistance, and suitability for metal appliance use. If using Plasti Dip or similar vinyl coatings, follow manufacturer guidance on dishwasher exposure. Some are durable, but not all are rated for continual dishwasher immersion.
Step-by-Step: How to Clean a Dishwasher Rack Before Recoating
Proper cleaning is crucial for coating adhesion. If grease, minerals, or rust remain, new coatings will peel or fail quickly. Follow these steps carefully.
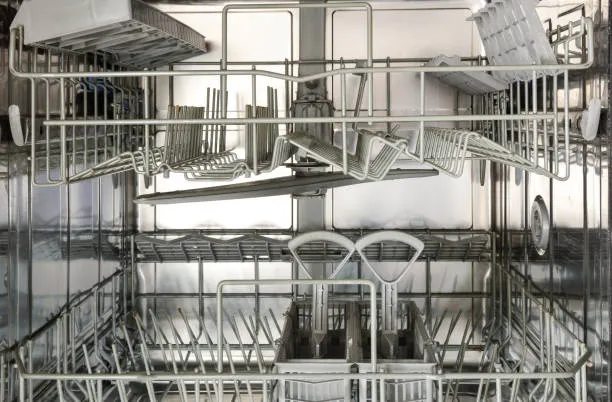
Step 1: Remove the Rack and Assess the Damage
- How to safely remove both upper and lower racks
Pull the rack fully forward, locate the release clips or stops at the track ends, depress or lift the stops as needed and slide the rack off the rails. For the upper rack, remove any adjustable stops or plastic end caps first. For the lower rack, lift slightly if it’s on roll stops before sliding out. If your model has removable tines or folding sections, collapse them to reduce snagging while removing the rack.
- Take photos for reference before starting.
Photograph each side of both racks, including close-ups of any rust, chips, or worn coating and a wide shot showing their overall condition. These photos help you remember original placement of removable parts and provide a reference if you need replacement parts later.
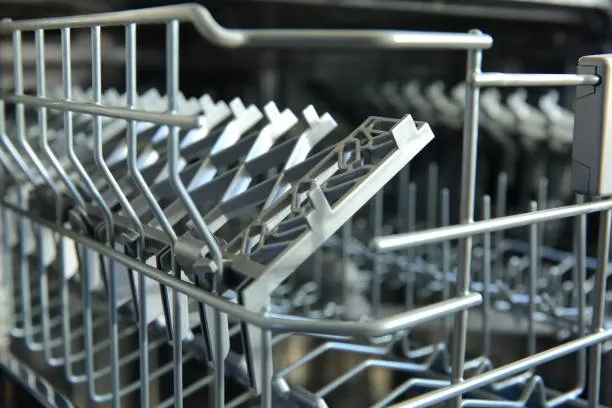
- Identify all damaged areas.
Inspect the entire rack surface for chips in the vinyl or polymer coating, flaking, bubbling, bare metal exposure, and rust spots. Check underneath the rack, around welds and joints, and along edges and tine bases where wear is common.
- Mark problem spots with tape or marker.
Place small pieces of painter’s tape or removable labels near each damaged area and number them if there are multiple spots. This makes it easy to prioritize repairs and track progress while you clean, sand, and recoat.
Step 2: Remove Loose and Damaged Coating
- Technique for removing chipped coating.
Use a sharp utility knife to lift the raised edges of chipped or bubbled coating, working gently to avoid gouging the underlying metal. Grip lifted edges with needle-nose pliers and peel away loose sections. For stubborn flakes, a small scraper or putty knife can help remove remaining loose material.
- Caution against removing intact coating unnecessarily.
Only remove coating that is loose, cracked, bubbling, or flaking. Intact coating provides protection. Cutting or stripping it unnecessarily increases the area to repair and can expose fresh metal to potential rust.
- Focus on areas with exposed metal or rust.
When you find bare metal or rust, remove all loose coating and flaky rust until you reach solid, clean metal. Use a wire brush, medium-grit sandpaper (120–220 grit), or a rotary brush to clean rusted spots down to bright metal, then wipe the area with a solvent like isopropyl alcohol to remove dust and oils before proceeding to priming and recoating.
Step 3: Address Rust Spots
Rust must be removed completely before recoating a dishwasher rack. Any remaining rust will continue to corrode and spread beneath the new coating, causing bubbling, flaking and failure of the finish.
- Light rust
Use fine-grit sandpaper (220–400 grit) or a non-scratch scouring pad to remove surface rust down to bare metal. Wipe with a cloth dampened with white vinegar or a mild citric-acid solution to dissolve residual oxidation, then rinse.
- Moderate rust
Start with a wire brush or a drill-mounted wire wheel to reach pitted areas, then feather with sandpaper to smooth edges. Apply a commercial rust remover or naval jelly following the label, neutralize and rinse thoroughly. Repeat until no orange or flaky material remains.
- Heavy rust
For deep pitting or scale, mechanical removal (sanding to bare metal, grinding or media blasting) is often required. If structural ribs or welded joints are compromised, consider replacing the affected section or the entire rack. After aggressive removal, de-grease and rinse well.
After any method, inspect closely. A clean surface will show solid metal with no flaky residue. If any rust remains, the new coating will trap moisture and the corrosion will continue under the finish.
Step 4: Deep Clean the Entire Rack
Before coating, eliminate all food particles, grease and dishwasher detergent residue so the coating bonds to clean metal.
- Fill a basin or use a sink with warm water and a high-quality dish soap or a degreasing cleaner. Scrub the entire rack with a stiff nylon brush or a toothbrush for tight spots, paying attention to crevices, corners and welds.
- For grease build-up, use a degreaser or a paste of baking soda and water; let sit briefly, then agitate with the brush.
- Rinse thoroughly with clean, running water until no soap or residue remains. Residual cleaners can interfere with adhesion and curing of the coating.
Step 5: Dry and Prep the Surface
Proper drying and surface prep ensure the coating adheres and lasts.
- After rinsing, dry the rack completely with clean towels and allow air-drying in a warm, dry area. Use compressed air or a hair dryer on low heat to blow moisture from welds and crevices.
- Wipe the entire surface with isopropyl alcohol or denatured alcohol to remove oils, fingerprints and remaining contaminants. Alcohol evaporates quickly and improves adhesion.
- Verify the surface is bone dry before applying any coating. Moisture trapped under the coating will cause blistering and poor adhesion.
How to Recoat Dishwasher Rack: Application Techniques for Long-Lasting Results
Recoating is the crucial final phase for restoring appearance and preventing future corrosion. Choosing the right product matters, but technique is equally important. Always follow the specific product instructions for preparation, application temperature, drying time and cure schedule.
- Product choice
Use coatings designed for dishwasher racks such as vinyl/rubber rack coating, porcelain-touch up, or high-temperature appliance enamel formulated for wet environments.
- Application technique
Apply multiple thin, even coats rather than one heavy coat. Thin coats reduce runs and ensure proper drying and adhesion. Overlap each pass slightly for full coverage and avoid pooling at welds or joints.
- Masking and protection
Mask areas that should not be coated like the wheel axles, rubber bumpers, or parts labeled by the manufacturer. Lay the rack on a raised surface so air can circulate under it and allow even coverage.
- Drying and curing
Observe the manufacturer’s recommended flash time between coats and final cure time before putting the rack back into service. Full chemical and mechanical resistance often requires full cure – sometimes, 24–72 hours or longer. Do not load or run the dishwasher until cured.
- Environment and safety
Work in a well-ventilated area. Wear gloves and eye protection, and follow all safety and VOC guidelines on the product label.
- Final inspection
After curing, check for missed spots, runs, or thin areas and touch up as needed. Properly applied coatings will adhere tightly, resist chipping and protect against future rust when the surface is fully cleaned and prepared.
Technique, patience and strict adherence to product directions will deliver a durable, long-lasting finish when recoating a dishwasher rack.
Maintenance Tips to Prevent Future Rack Damage
Once you’ve learned how to clean a dishwasher rack and complete a successful repair, ongoing maintenance is the key to keeping it in good condition. A few simple habits can dramatically extend the life of both repaired and brand-new racks while preventing rust from returning.
Regular Inspection
Your dishwasher racks are constantly exposed to heat, water, and detergent. Over time, this can weaken the protective vinyl coating that prevents the metal underneath from rusting. That’s why regular inspection is essential. Set a reminder to check your racks at least once a month. During your inspection, do the following:
- Look closely for small chips or cracks in the coating. These often appear on corners, edges, or areas where dishes frequently rest.
- Check for bubbling or peeling, which may indicate that moisture has already started getting underneath the coating.
- Inspect for exposed metal, even if it’s just a tiny spot. Bare metal is highly vulnerable to rust.
If you find minor damage, address it right away. When the protective layer is compromised, water and detergent can quickly cause corrosion. Small touch-up repairs are inexpensive and simple compared to replacing or fully recoating an entire rack.
Even if you don’t see rust, applying annual touch-ups to high-contact areas can serve as preventative maintenance. Staying proactive helps extend the life of your racks, maintain dishwasher performance, and avoid costly replacements.
Best Loading Practices
How you load your dishwasher directly affects the lifespan of your racks. Improper loading can bend the wire structure, weaken the coating, and create stress points that lead to cracking and rust. To protect your racks, do the following:
- Avoid overloading – When racks are crammed with dishes, excess weight can bend the wires and cause the coating to crack. Overloading also reduces cleaning efficiency.
- Place heavy cookware on the bottom rack – Items like cast iron pans, large pots, and heavy baking sheets put significant strain on the rack structure. The bottom rack is designed to handle more weight.
- Keep metal utensils from rubbing against rack wires – During wash cycles, water pressure can cause utensils to shift, leading to repeated friction that wears down the coating.
- Do not force dishes into tight spaces – Scraping or jamming items into place can chip the protective layer and expose the metal underneath.
Practicing proper loading habits improves water circulation, enhances cleaning performance, and ensures your dishwasher operates efficiently for years to come.
Troubleshooting Common Dishwasher Rack Repair Issues
Even when you follow every step, issues can occasionally pop up. Understanding common problems makes it easier to fix them quickly and avoid repeat damage.
Problem: The New Coating Peels or Cracks After a Few Wash Cycles
If the new coating begins to peel, bubble, or crack shortly after application, the surface likely wasn’t properly prepared. Any leftover rust, grease, soap residue, or moisture can interfere with adhesion.
The coating needs a clean, dry, and slightly roughened surface to bond effectively. If it doesn’t adhere properly, water will quickly seep underneath and cause rust again.
Solution:
- Remove the failed coating completely.
- Sand the affected area to bare, clean metal.
- Thoroughly clean the area with rubbing alcohol or a degreaser.
- Allow it to dry completely before reapplying.
- Apply thin, even coats and allow proper curing time before using the dishwasher.
Proper surface preparation is the most important step in ensuring long-lasting results.
Problem: Rust Reappears in the Same Spot
Recurring rust usually means the original corrosion wasn’t fully removed. In some cases, the metal may be deeply pitted or structurally weakened beneath the surface. Rust spreads beneath coatings if any corrosion remains. Covering it without fully removing it only delays the problem.
Solution:
- Sand or grind the area until all rust is removed and only clean metal remains.
- If the metal is severely pitted or thinning, consider replacing the rack instead of repairing it.
- Apply a rust-inhibiting primer (if compatible with your repair kit) before recoating.
If rust keeps returning despite proper repairs, the rack may be nearing the end of its usable life.
Problem: The Coating Looks Uneven or Bumpy
An uneven finish is typically caused by applying the coating too thickly or not allowing adequate drying time between layers. Thick layers take longer to cure and are more likely to bubble, sag, or crack under heat and water exposure.
Solution:
- Lightly sand the uneven area once fully dry.
- Reapply using multiple thin coats instead of one heavy application.
- Follow the manufacturer’s recommended drying and curing times.
Thin, even layers provide better durability, smoother coverage, and longer-lasting protection. Addressing problems promptly and correctly will extend the life of your repair and help keep your dishwasher racks rust-free for years to come.
When to Call a Professional or Replace
While many dishwasher rack problems can be repaired at home, some types of damage go beyond what simple touch-ups can fix. Knowing when to replace the rack or consult a professional can save you time, money, and ongoing frustration.
If the rack has significant rust-through, broken wires, or large areas where the metal frame is weakened, repairs are unlikely to restore its original strength. Surface coating products are designed to protect exposed metal, not rebuild compromised structure. When the frame itself is deteriorating, full replacement or professional appliance repair is the safest and most reliable solution.
Racks that are bent or warped and no longer slide or sit properly should be replaced. A misaligned rack can interfere with spray arm movement, reduce cleaning performance, and create safety concerns when loading or unloading dishes. If the rack cannot be adjusted back into proper position, replacement ensures both operational efficiency and safe use.
If repaired areas continue to peel, crack, or develop rust despite proper preparation and application, it often signals deeper metal corrosion. In these cases, continued repairs become temporary fixes rather than lasting solutions.
It’s also important to consider the overall cost of restoration. Add up the price of repair kits, tools, and the time invested. If repeated repairs approach or exceed the cost of a new rack, replacement is typically the more practical choice. A new rack restores full structural integrity and provides longer-term reliability.
Recognizing when repair is no longer worthwhile helps ensure your dishwasher remains safe, efficient, and dependable.
Cost Comparison: DIY Rack Repair vs. Replacement
Understanding the costs involved can help you decide whether repairing or replacing your dishwasher rack is the more practical option.
DIY rack repair typically costs between $20 and $40 for supplies and requires about one to two hours of hands-on work, plus additional drying or curing time. This option is best suited for minor to moderate damage where the rack structure remains intact.
In contrast, a replacement rack generally costs between $80 and $300 or more, depending on the dishwasher’s brand and model. Installation usually takes only a few minutes and requires minimal effort. Replacement is the better choice for severe rust, broken wires, warping, or repeated repair failures.
For many homeowners, learning how to recoat a dishwasher rack can provide substantial savings when the damage is limited and addressed early.
Final Thoughts on How to Properly Clean and Recoat a Dishwasher Rack
Knowing how to clean a dishwasher rack and how to recoat a dishwasher rack turns a common appliance issue into a manageable DIY project. With proper preparation, the right materials, and regular maintenance, you can restore your rack, prevent rust, and extend the life of your dishwasher.
Routine inspections and smart loading habits help prevent future damage and reduce long-term costs. However, when rack damage becomes extensive or repair attempts no longer hold up, professional help is the smarter choice.
On Point Service Company specializes in professional dishwasher repairs and replacements. Contact On Point Service Company to ensure your appliance stays safe, efficient, and reliable for years to come.
